Showing posts with label Condiments. Show all posts

Wednesday, 23 January 2013

Cultured Butter

Earlier this week I posted the process of making homemade butter.
I would like to add the option of making cultured butter which I really like.

It's virtually the same process, the only difference is you culture the cream for 24 hours before you make the butter.


What makes cultured butter different from regular butter?
  • Cultured butter is sometimes called European butter because it is common there and newer to US and Canada.
  • It contains probiotics from the cultures which is a nice little boost nutritionally.
  • The culture breaks down the lactose in the cream making it easier to digest.
  • Culturing creates the optimum ration of omega 3 to omega 6.
  • Cultured butter has a more complex flavour. It's tangy and, well... buttery. Some butters add chemicals that they call "natural flavour" to try to replicate the classic cultured butter flavour.
Recipe

organic cream
culture (I use kefir grains)

Method


1. Pour the cream into a mason jar and add kefir grains to culture the cream. Top with a coffee filter held on with elastic band. Leave for 24 hours.


You can see the lumps of grains at the top in this cream.

If its very warm in your kitchen it could be ready sooner, even 8 hours.


2. Pour the cultured cream into a plastic strainer over a bowl to remove the grains. Keep the grains to do your next culture.

Note: Never use metal near your kefir grains. The vibration from the metal can harm the bacteria. Plastic strainer and utensils are a must.


Here are my grains in a clean jar, all ready to culture a new batch of milk for kefir, and my cultured cream in the bowl.


 3. Mix cream in a blender, mixer, or food processor.


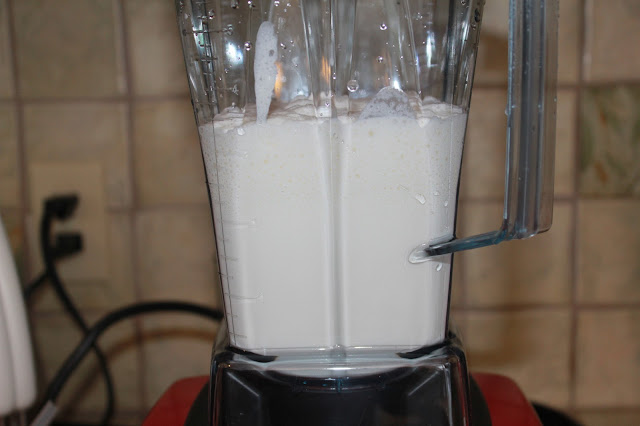
Keep mixing, stopping to scrape down sides (or with a Vitamix, use the tamper). At first you will make whipped cream, then it will become very stiff whipped cream, then it will break into pea sized lumps in a milky liquid.

Keep mixing. Eventually the pea sized lumps will stick together in one big ball floating in buttermilk.

4. Pour the buttermilk out. Keep it in a jar in the fridge until ready to use. (A great addition to biscuits or pancakes.)


5. Transfer the butter that is left (after pouring the buttermilk off) into a bowl and wash the butter.

Washing the butter is exactly how it sounds. Pour filtered water into the bowl and use a spatula to move the butter around in the water. Drain the cloudy water and repeat 2, 3, or more times until the water is clear.

Note: Filtered water is needed as chlorinated water will kill the good bacteria from the culture.

Basically you want to push the butter onto the side of your dish, folding and pushing to SQUEEZE out any remaining buttermilk.

Why bother squeezing out the last of the buttermilk? Your butter will spoil quickly if there is buttermilk present. Getting it all out helps it keep longer. (Although cultured butter should keep longer than non-cultured.)

Optional: At this point you can stir in a small amount of sea salt to taste (I didn't salt mine.)


6.  Scrape the lump of butter out of the bowl and onto cheese cloth or a clean dish towel. Twist it up and squeeze gently to remove any last bit of water.


Put it in an air tight container (I have a locking lid for this glass dish) and it will be good for about a week on the counter or 2 in the fridge. It can also be put in the freezer for many months.

Tip: Buy your cream in the spring and early summer when the grass is fresh (that the cows graze on) and the nutrient quality of the cream is highest. Make lots of butter and store it in the freezer.

Saturday, 19 January 2013

Homemade Butter

The idea of making my own butter would have never crossed my mind a year ago. Images of pioneer women bent over an ancient-looking device, hours of blood sweat and tears... okay it might not have been that bad - but it sounded like hard work!

Imagine my surprise to find out that making my own butter is easy. At least it is with modern machinery. All you have to do is pour some cream into a blender, mixer, or food processor, and hit the button to make it spin. Eventually, there's butter in the bowl.

But why would I make it, even if it is easy? It's easier still to grab a block at the grocery store. The main reason is that any toxins present in the milk are generally stored in the fat. That means that your block of butter has most of the toxic chemicals from the cow's milk it came from all wrapped up in a pretty gold package for you to eat. Yum.

Buying organic butter greatly reduces the toxins present, but organic butter is expensive. At least it is in my grocery store (almost $10 a pound). Organic cream is cheaper. Plus, you get the benefits of a jar of fresh buttermilk as a byproduct (hello buttermilk biscuits!) and you get FRESH butter. You can have it salted or unsalted. Finally, you will know that there are no other additives and that the butter is not rancid. (Butter goes rancid easily.)

Ingredients
  • organic cream  (usually labeled whipping cream or 35% milk fat)

Method


1. Pour the cream into a blender, mixer, or food processor and mix.

I see many people use their Kitchen Aid mixer, but I used my Vitamix. That way, I didn't have to worry about splatter because of the lid. If you are using a mixer, start off slow to avoid splatter and then turn up the speed once it thickens.

Keep mixing, stopping to scrape down sides (or with a Vitamix, use the tamper). At first you will make whipped cream, then it will become very stiff whipped cream, then it will break into pea sized lumps in a milky liquid.

Keep mixing. Eventually the pea sized lumps will stick together in one big ball floating in buttermilk.


2. Pour the buttermilk out.

Keep it in a jar in the fridge until ready to use. Did I mention the buttermilk biscuits?


3. Now you have butter. But... your not quite done yet. You want to "wash" the butter.


Washing the butter is exactly how it sounds. Pour filtered water (or regular tap water) into the bowl and use a spatula to move the butter around in the water. Drain the cloudy water and repeat.


I washed mine 3 times before the water was clear.

Basically you want to push the butter onto the side of your dish, folding and pushing to SQUEEZE out any remaining buttermilk.

Why bother squeezing out the last of the buttermilk? Your butter will spoil quickly if there is buttermilk present. Getting it all out helps it keep longer.

Optional: At this point you can stir in a small amount of sea salt to taste (I didn't salt mine.)


4.  Scrape the lump of butter out of the bowl and onto cheese cloth or a clean dish towel.

Twist it up and squeeze gently to remove any last bit of water. (Don't squeeze too hard or the butter will be oozing through the cloth...don't ask me how I know this.)


It will be good for a few days on the counter or a week or more in the fridge. It can also be put in the freezer for many months.

Tip 1: Put it in an air tight dish (I have a locking lid for this glass dish) as butter absorbs odors that surround it.

Tip 2: Buy your cream in the spring and early summer when the grass is fresh (that the cows graze on) and the nutrient quality of the cream is highest. Make lots of butter and store it in the freezer.

This butter is so LIGHT and FRESH. It has a whipped consistency, and a mild, slightly sweet taste.

Friday, 18 January 2013

Homemade Nutella


My son loves Nutella... well, who doesn't? We decided to make our own after I was inspired by the recipe found on this blog.

We had 3 main goals - It had to be nutritious, it had to be smooth and it had to be chocolatey! It is all of those things and more.

It passed our family's taste test and also my mom's. She thought it would be great to keep in the fridge to enjoy a spoonful when a chocolate craving hit!


The Recipe

1/2 cup raw hazelnuts
1 tbs coconut oil
1 tbs real vanilla extract
2 tbs dark cocoa powder
3 tbs real maple syrup


The Method


 Heat oven to 350 F and roast raw hazelnuts for 10 minutes. Let cool.

Watch the clock or set a timer. Nuts roast very quickly and even continue cooking after being removed from the oven. Under roasting is better than over roasting. (I speak from experience after over roasting peanuts for peanut butter. The flavour was overpowering.)


Rub the hazelnuts in your palms and the skins will fall right off. Little M calls this "taking off their jackets" which I think is quite cute!


Gather ingredients.

I used real vanilla extract because the artificial vanilla is quite toxic. (Further info about toxicity.)

The cocoa I used is called ruddy red cocoa and it's a beautiful dark colour that's so rich in flavour. You can get it at the Bulk Barn.

Melt coconut oil for easier blending.

Put the roasted hazelnuts and rest of ingredients into blender. A high-speed blender is best to get a smooth result. I used a Vitamix. I stopped a few times to scrap down the mixture and be sure that it was getting blended thoroughly.


This nutella is so fresh and bursting with flavour.


Little M wanted some on toast immediately!

Wednesday, 12 December 2012

Homemade Applesauce

Nothing makes a kitchen smell better than apples cooking on the stove. And it's also about the easiest thing to make.
There's nothin' to it! You'll never go back to store-bought applesauce once you've made your own.

Take out a few apples and chop them into chunks, cubes, whatever.
Remove the core and stems.

I buy organic apples because we eat so many of them, but if you are using regular apples you should peel them first.

This pot contains 3 chopped organic apples.

Put them in a pot on medium heat and add enough water to barely cover them.

Bring them to a gentle boil and let them cook until fork tender, about 10 minutes.

Take them off the heat and let them cool a bit. Then transfer to a blender and pulse a few times to get the consistency you like. (If you had peeled them, you could just mash them with a potato masher right in the pot.)

Finished applesauce.

Note 1: I don't like mine to be too watery, so I lift my cooked apples out of the remaining water with a slotted spoon and transfer to the blender instead of dumping in apples and water together.
(But save that water for soaking grains or nuts!)

Note 2: Its lovely plain, but you could also add a sprinkling of cinnamon before blending.

And that's it.

I'm sure you could put it in a jar or covered dish and it would keep in the fridge for a while... but I have never made any that didn't get eaten up right away!