Showing posts with label Traditional techniques. Show all posts

Saturday, 16 March 2013

Sourdough Pizza

Little M likes pizza. Well, we all like pizza in our family, but Little M really, really likes pizza! So I make homemade pizza using sourdough crust, fresh veggies for toppings, and a pizza stone to make it crispy.

If you haven't read any info about sourdough, I will give you a short explanation:

The big deal about sourdough is that the "starter" is a colony of wild yeast and lactobacilli (good bacteria, as found in yogurt) and when you mix the starter with your flour and allow it to ferment, the bacteria eats (breaks down) the gluten, making the flour easier on the digestive system.

So, sourdough pizza is nice and easy on the belly. That's a good thing for kids, and for grown ups too.
Plus, freshly made pizza is yummy! We make 3 at a time, each of us customizing our toppings. And then we all have leftovers for lunches.

Okay, here's the recipe...

Pizza Dough

Ingredients

1 1/2 C sourdough starter
1 1/2 C whole wheat or unbleached white flour
3/4 tsp sea salt
2 tbs melted coconut oil

Method

1) Mix ingredients in a bowl and when a ball begins to form, pick it up and kneed it for 5 mins.

2) Rub a bit of coconut oil in the bowl and on the dough ball to keep it from drying out and/or sticking to the bowl.

3) With the dough ball inside the bowl, cover with clean dish towel and leave in a warm place (in the oven with the oven light on for example) for 3-4 hours.

Note: Traditionally olive oil is used in pizza dough. I chose to use coconut oil because olive oil denatures at the high temperature needed to cook pizza while coconut oil remains stable.

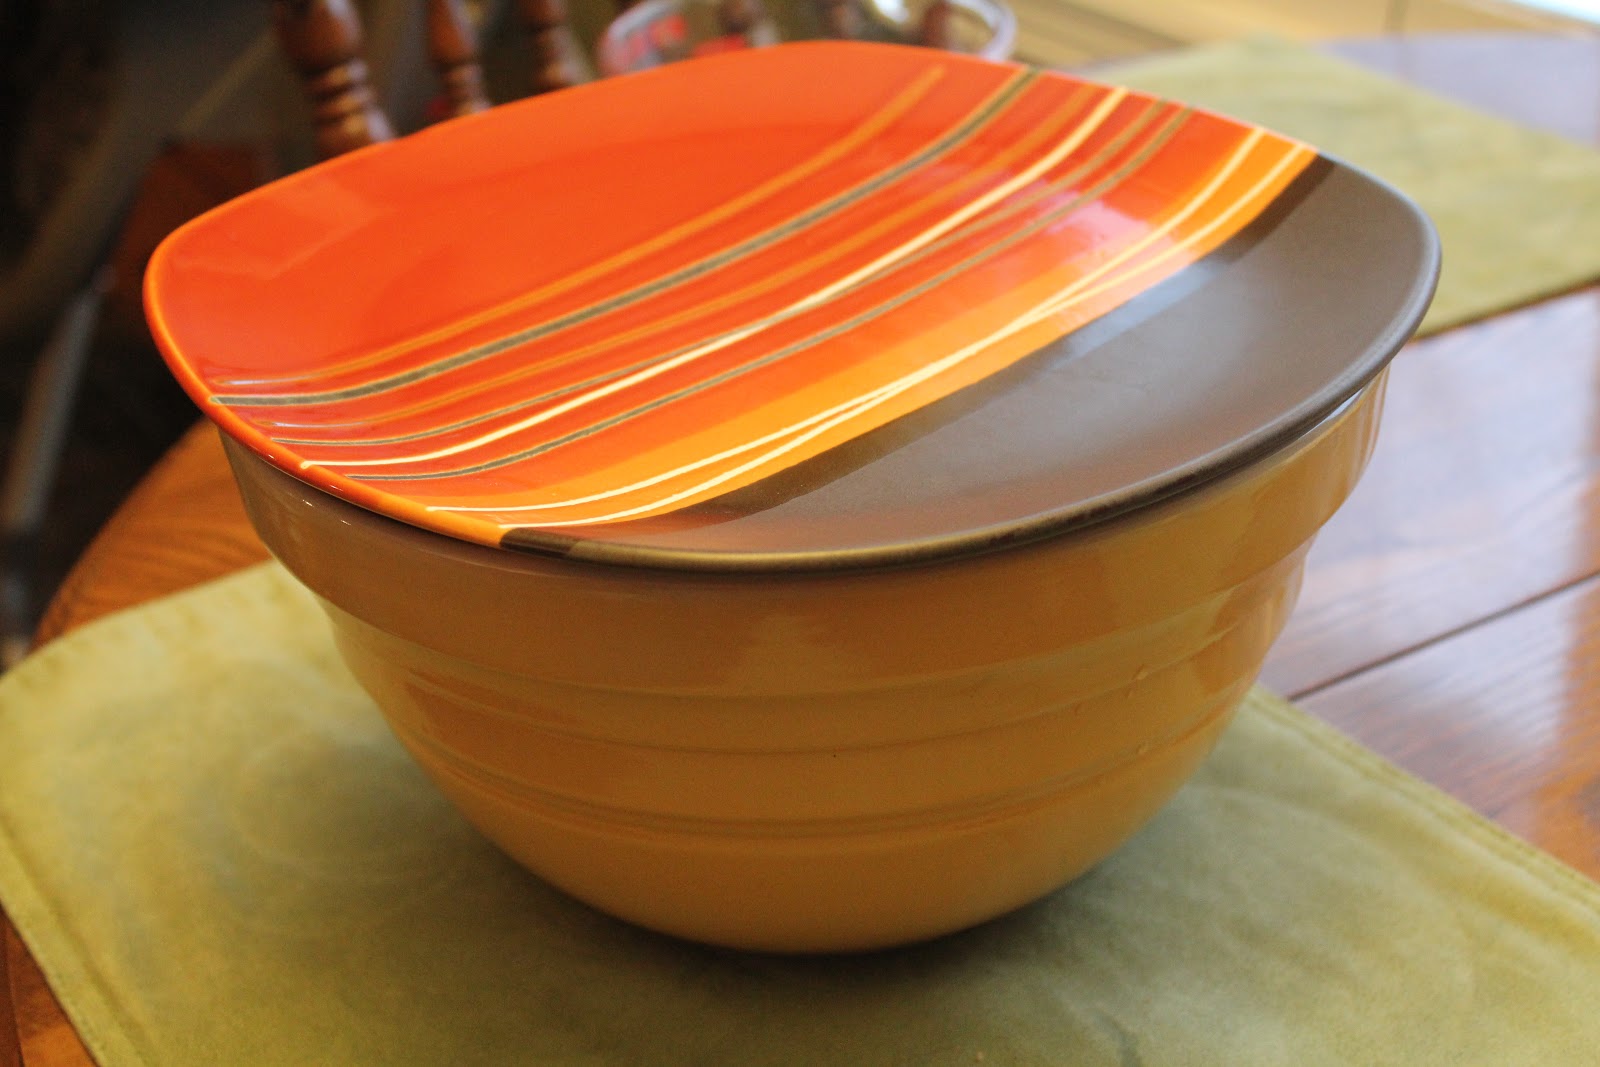
Here is my dough ready to be divided in 3 equal pieces to make 3 pizzas.

Making Pizza

1) Preheat oven (and pizza stone if you have one) at 500 F.

Warning: Never put a cold pizza stone into a hot oven, it may crack.

2) Chop desired toppings, grate cheese, make or open a can of pizza sauce. 

3) Place dough ball on floured surface and using a large knife, cut into 3 equal pieces.

We find it fun that we each get to make our own pizza!

4) Taking one piece at a time, roll into a round ball, then lay on floured surface and using a rolling pin roll out to desired thickness. (I like a thin crust.)

Mr. J doesn't use a rolling pin. He likes to throw it in the air and catch it on his finger tips. He ends up ripping holes in it and it looks pretty bad when he's done... but I don't say anything since I don't have to eat it (lol).

5) Because I use a pizza stone, I use a peel (large paddle) to slide the pizza into the oven. I sprinkle corn meal on the peel to prevent sticking and then lay the rolled-out dough on it.

6) Top the dough with pizza sauce, toppings of choice, and cheese if using.

I like to use basil leaves, spinach, peppers, mushrooms, onions, and almost any other veggie I have on hand. I also like pineapple on top.

I usually only use a small amount of cheese. I prefer cheddar because it's more flavourful, I find a little goes a long way. It looks like a lot in the photo, but that is mostly yellow and orange peppers you are seeing on top!

(Little M and Mr. J like meat like hamburg and bacon with their veggie toppings.)

7) Slide the pizza off the peel and onto the hot stone. Bake for 8 mins. Then put the next pizza in until everyone's is cooked.

Yum! Dinner time....

This one is mine, hot out of the oven.


Wednesday, 23 January 2013

Cultured Butter

Earlier this week I posted the process of making homemade butter.
I would like to add the option of making cultured butter which I really like.

It's virtually the same process, the only difference is you culture the cream for 24 hours before you make the butter.


What makes cultured butter different from regular butter?
  • Cultured butter is sometimes called European butter because it is common there and newer to US and Canada.
  • It contains probiotics from the cultures which is a nice little boost nutritionally.
  • The culture breaks down the lactose in the cream making it easier to digest.
  • Culturing creates the optimum ration of omega 3 to omega 6.
  • Cultured butter has a more complex flavour. It's tangy and, well... buttery. Some butters add chemicals that they call "natural flavour" to try to replicate the classic cultured butter flavour.
Recipe

organic cream
culture (I use kefir grains)

Method


1. Pour the cream into a mason jar and add kefir grains to culture the cream. Top with a coffee filter held on with elastic band. Leave for 24 hours.


You can see the lumps of grains at the top in this cream.

If its very warm in your kitchen it could be ready sooner, even 8 hours.


2. Pour the cultured cream into a plastic strainer over a bowl to remove the grains. Keep the grains to do your next culture.

Note: Never use metal near your kefir grains. The vibration from the metal can harm the bacteria. Plastic strainer and utensils are a must.


Here are my grains in a clean jar, all ready to culture a new batch of milk for kefir, and my cultured cream in the bowl.


 3. Mix cream in a blender, mixer, or food processor.


Keep mixing, stopping to scrape down sides (or with a Vitamix, use the tamper). At first you will make whipped cream, then it will become very stiff whipped cream, then it will break into pea sized lumps in a milky liquid.

Keep mixing. Eventually the pea sized lumps will stick together in one big ball floating in buttermilk.

4. Pour the buttermilk out. Keep it in a jar in the fridge until ready to use. (A great addition to biscuits or pancakes.)


5. Transfer the butter that is left (after pouring the buttermilk off) into a bowl and wash the butter.

Washing the butter is exactly how it sounds. Pour filtered water into the bowl and use a spatula to move the butter around in the water. Drain the cloudy water and repeat 2, 3, or more times until the water is clear.

Note: Filtered water is needed as chlorinated water will kill the good bacteria from the culture.

Basically you want to push the butter onto the side of your dish, folding and pushing to SQUEEZE out any remaining buttermilk.

Why bother squeezing out the last of the buttermilk? Your butter will spoil quickly if there is buttermilk present. Getting it all out helps it keep longer. (Although cultured butter should keep longer than non-cultured.)

Optional: At this point you can stir in a small amount of sea salt to taste (I didn't salt mine.)


6.  Scrape the lump of butter out of the bowl and onto cheese cloth or a clean dish towel. Twist it up and squeeze gently to remove any last bit of water.


Put it in an air tight container (I have a locking lid for this glass dish) and it will be good for about a week on the counter or 2 in the fridge. It can also be put in the freezer for many months.

Tip: Buy your cream in the spring and early summer when the grass is fresh (that the cows graze on) and the nutrient quality of the cream is highest. Make lots of butter and store it in the freezer.

Strawberry Kefir Ice Cream

This "ice cream" is a favourite for me and little M. Now, Mr. J likes it, but we love it! We make it ALL the time!! We like it at breakfast, after school, or for dessert.

It's sweet and tangy and fruity... and it's full of nutritious goodness.

I use organic strawberries because conventional strawberries are heavily sprayed and have been shown to contain up to 36 different pesticides including methyl bromide. They are always featured at the top end of the dirty dozen list of the most toxic non-organic food.


Recipe

3/4 cup kefir
1 cup frozen organic strawberries
1 tbs raw honey
6 ice cubes

Any frozen berries work well, we also like blackberries and raspberries.

Method


Drop all ingredients into Vitamix.


 Move speed quickly from 1 to 10. Use the tamper to push ice and berries down until all mixed (about 30 secs). Flip switch to high and run about 30 secs more, until 4 peaks form.


Scoop out with ice cream scoop.

Note: If using a regular blender, you can make the recipe with unfrozen strawberries and once blended put into an ice cream maker until set.

Saturday, 19 January 2013

Homemade Butter

The idea of making my own butter would have never crossed my mind a year ago. Images of pioneer women bent over an ancient-looking device, hours of blood sweat and tears... okay it might not have been that bad - but it sounded like hard work!

Imagine my surprise to find out that making my own butter is easy. At least it is with modern machinery. All you have to do is pour some cream into a blender, mixer, or food processor, and hit the button to make it spin. Eventually, there's butter in the bowl.

But why would I make it, even if it is easy? It's easier still to grab a block at the grocery store. The main reason is that any toxins present in the milk are generally stored in the fat. That means that your block of butter has most of the toxic chemicals from the cow's milk it came from all wrapped up in a pretty gold package for you to eat. Yum.

Buying organic butter greatly reduces the toxins present, but organic butter is expensive. At least it is in my grocery store (almost $10 a pound). Organic cream is cheaper. Plus, you get the benefits of a jar of fresh buttermilk as a byproduct (hello buttermilk biscuits!) and you get FRESH butter. You can have it salted or unsalted. Finally, you will know that there are no other additives and that the butter is not rancid. (Butter goes rancid easily.)

Ingredients
  • organic cream  (usually labeled whipping cream or 35% milk fat)

Method


1. Pour the cream into a blender, mixer, or food processor and mix.

I see many people use their Kitchen Aid mixer, but I used my Vitamix. That way, I didn't have to worry about splatter because of the lid. If you are using a mixer, start off slow to avoid splatter and then turn up the speed once it thickens.

Keep mixing, stopping to scrape down sides (or with a Vitamix, use the tamper). At first you will make whipped cream, then it will become very stiff whipped cream, then it will break into pea sized lumps in a milky liquid.

Keep mixing. Eventually the pea sized lumps will stick together in one big ball floating in buttermilk.


2. Pour the buttermilk out.

Keep it in a jar in the fridge until ready to use. Did I mention the buttermilk biscuits?


3. Now you have butter. But... your not quite done yet. You want to "wash" the butter.


Washing the butter is exactly how it sounds. Pour filtered water (or regular tap water) into the bowl and use a spatula to move the butter around in the water. Drain the cloudy water and repeat.


I washed mine 3 times before the water was clear.

Basically you want to push the butter onto the side of your dish, folding and pushing to SQUEEZE out any remaining buttermilk.

Why bother squeezing out the last of the buttermilk? Your butter will spoil quickly if there is buttermilk present. Getting it all out helps it keep longer.

Optional: At this point you can stir in a small amount of sea salt to taste (I didn't salt mine.)


4.  Scrape the lump of butter out of the bowl and onto cheese cloth or a clean dish towel.

Twist it up and squeeze gently to remove any last bit of water. (Don't squeeze too hard or the butter will be oozing through the cloth...don't ask me how I know this.)


It will be good for a few days on the counter or a week or more in the fridge. It can also be put in the freezer for many months.

Tip 1: Put it in an air tight dish (I have a locking lid for this glass dish) as butter absorbs odors that surround it.

Tip 2: Buy your cream in the spring and early summer when the grass is fresh (that the cows graze on) and the nutrient quality of the cream is highest. Make lots of butter and store it in the freezer.

This butter is so LIGHT and FRESH. It has a whipped consistency, and a mild, slightly sweet taste.

Friday, 18 January 2013

I've got Kefir!

Milk Kefir Grain
I have read all about the health benefits of kefir and I was sooo ready to make my own. In a nutshell it's like a ramped-up version of yogurt. While yogurt has a few strands of beneficial bacteria, kefir has upwards of 30 strands. Also, it's easier to make because it ferments at room temperature while yogurt requires some sort of heat incubation. If you want more info about kefir, check out Cultures for Health's Kefir FAQ page.

I couldn't wait to get started so I called our local health food store to ask if they carried kefir grains (little globs of cultured bacteria and yeast that look little mini cauliflowers needed to turn milk into kefir) but alas... they did not. I live in Prince Edward Island and it can be difficult to get specialty items here.

After some snooping around, I found a lady who had extra culture of her own and was willing to sell some. I was so excited. She lives on a farm in the country so my husband (Mr. J) and I waited for a nice sunny day (it's winter here) to pack up the baby and take a drive out to the country.

We had the usual PEI instructions, which include things like "look for such and such landmark, turn left, drive for X amount of minutes" and ending with "we are the second farm on the left".

The driveway was very long and climbed uphill and we noticed a ravine of flowing water on either side of the long drop if one were to go too far on either side of the driveway. As we carefully drove on, we realized how icy it was. Now, there's normal icy and then there's this driveway... it was like driving on a pond, only up hill. We started to feel panicked... okay, I started to feel panicked, Mr. J started grumbling - what was so important about this frigin' kefir crap that we had to be navigating this death trap?

When we got to the house, we carefully worked on turning the car around. We slid and slipped and I was actually getting scared. I was no longer thinking about the grains, but we had come this far, so I wasn't going to leave without them. The lady was really nice to me and she was quite apologetic about the driveway. It seams she hadn't known it was that bad. She brought me inside to her farm house that was more than a century old. It was pretty neat to see, as I like that sort of thing.

By the time I had gotten back to Mr. J and baby A, I found out that the car had been slowly sliding while parked! There was no water or drop off at the top of the driveway so no immediate danger, but it was unsettling nevertheless. Mr. J was in a big hurry to get out of there. So I held my little dish of grains and said a prayer for our safety as we descended the long driveway. As we got closer to the water and the steep drop off, no one said a word. He was concentrating on keeping the car straight as an arrow and I was holding my breath. Finally we made it to the main road - what a relief!

When we arrived home from out little, ehem... adventure, I looked at my little kefir grains and thought, "boy you all were an awful lot of trouble." I put them in a glass jar and covered them with milk. I topped the jar with a coffee filter held on with an elastic band so the kefir could breathe.

I sure hope our family enjoys the kefir and gets plenty of health benefits from it. I know it will be a long while before I can talk my husband into "a little drive to the country to pick something up".

Monday, 31 December 2012

Sourdough Starter

I'm super excited to start my own sourdough starter! I have read a ton of articles and watched a few videos to get a technique and finally settled on the pineapple juice method.

Why that one? I don't have ideal conditions. It would be better if it were a warm summer day and I could put my starter by an open window. Instead, it's the middle of winter and we keep the house on the cool side. I figure if I'm going to try to lure some wild yest to my starter I better give it something it can't resist - sticky sweet pineapple juice!

It seams everyone has their own unique way of getting their starter going and its a bit confusing to sort out the "best" method. I've decided to jump in and try this one. If it fails, I'll just try another!


Day 1
I have taken a can of pineapples with no sugar or preservatives and mixed it up in my Vitamix.

(Yes!! I got a Vitamix for Christmas and I am having so much fun with it!!!  More Vitamix posts to come.)

I have washed out my non-metal tools in hot soapy water and rinsed in filtered water (no chlorine). I'm not sure if that step matters but I didn't want chlorine in my bowl killing my good wild yeast!!

I've put 1/2 cup of organic whole wheat flour into my ceramic bowl. I've added about 1 cup of pineapple juice to get the right consistency.

(I would have needed only 1/2 cup if it was thin strained juice and not blended up pineapple bits to thicken the juice.)


I mixed it with a wooden spoon, put a clean dish towel on top and left it alone for 12 hours. This was approximately 10 am.

Here it is sitting on top of this room heater (It's not hot on top).

So, at 10 pm I gave my mixture a stir and FED it with more flour and juice (about 1/4 cup of each this time).

This feeding must continue twice a day about 12 hours apart.

Day 2
Nothing interesting happening yet. I completed another morning and evening feed.

Day 3
It's 7 am and I am peering into my started dish looking for signs of life. I don't really see bubbles but I do think the mixture has grown in volume - could that be a sign? I smell the mixture repeatedly and decide that yes, the smell has changed. I don't know what sourdough is suppose to smell like but considering the thing is full of sweet pineapple juice, it certainly doesn't smell pineapple-y or sweet. It smells kind of neutral and light, maybe a bit floury. So, I'm convinced something is happening. I give it a big stir, send out a little prayer and tuck it back in under its dish towel.
                                
                                                                            * * *
I just completed the morning feeding. This time I had to take out 1/4 cup before doing anything as the starter was filling up most of my bowl. I put in my usual 1/4 cup of flour and a bit more than 1/4 cup of pineapple juice.

I was suppose to continue the pineapple juice in my feedings for the first 3 days, then switch to water and flour after that. However, I just used up the last of my juice (since I spilled some yesterday! oops!@&^!!) So for this evening, I will scoop 1/4 cup out again and compost it and put in a new 1/4 cup of flour and 1/4 cup of water.

Day 4

Well, I was feeling unhappy about my starter.

I thought I could see bubbles, but the dish I was using didn't allow me a good look. I did a bit more reading online and decided to switch to a glass mason jar. I also put a coffee filter on top rather than the thick towel.

I think these improvements will help as I can see what's going on much better and the filter lets more air pass into the starter.

Day 5

I got fancy and gave my starter a touch of molasses with this evenings feed. There are definitely bubbles and signs of life.

Oh, and by the way, now that the starter is ALIVE, it has become very intriguing for my 8-year-old so he now helps me feed the starter and has given him a name - Michealangelo!

Plus, he drew a cute little face on the jar :)

Michealangelo
Day 6 

SUCCESS!!!!!!!!

I am SO excited! This morning when I got up the mixture looked quite different. It was FULL of bubbles. They were actively rising and popping. The colour had darkened slightly, some water separated out a bit on top and it had a more intense smell (sort of like beer). This is sourdough starter!

I am convinced that the molasses made the difference. The yeast seams to love it!


Word of caution though... I have un-sulfured molasses. If you buy the kind that does contain sulfur it will KILL YOUR YEAST. Check and double check!!

So, not only had that worked out, but my wheat berries had also sprouted in their little jar. So without further ado, I blended my sprouted wheat in the vitamix with water, and put the resulting blend plus starter, flour, sea salt, and molasses, into a big bowl and mixed up my first batch of bread.

I put the mixture in a bread pan and left it in the oven with the oven light on to keep it warm so it would rise while I went about my day. Now I have good news and bad news....

The good news: 
This starter is powerful stuff! After 6 hours the mixture was light and fluffy and full of air bubbles and had risen very, very well!

The bad news:
My bread tin wasn't big enough to handle all that rising and it overflowed all over the bottom of my oven :(.

So I transfered the dough to 2 smaller pans (loosing some fluffyness and height in the process) and baked those pans of bread for 45 mins.

When they came out, they were lovely! The crust was crispy but the inside was soft with a pretty lattice of air holes. The only down side is they were both "short".

It would have been great if the loaf was baked in one nice, tall bread pan. Now I have 2 loaves of bread that are about half the height a loaf of bread should be. Not great for sandwiches or toast.

It was, however, wonderful with dinner... sliced up fresh and still warm with pats of butter melting on the slices of bread at the sides of our plates.

Many lessons learned today...
And for tomorrow -- Pancakes!


update: Things are running smoothly with the sourdough starter. I've been making bread, pancakes and pizza with it! I still keep it on my counter since it's still "young". After a while I will start keeping it in the fridge when I'm not using it.


Sunday, 16 December 2012

Easy Chicken Bone Broth

I have read lots of bone broth recipes and although the concept is simple, I ended up overwhelming myself with all the information. I didn't know where or how to start. Finally (thankfully) I decided to just give it a go and see how it turns out.

I may add to or change my methods later. For example, I may venture into chicken feet for the coveted gelatin. And I may learn the "perpetual bone broth" method. But I'm not there yet. I wanted a simple way to get started, and here it is.


1) As you make meals with whole chickens or bone-in chicken meat, freeze the left over bones after the meat is used.

I have a large zip lock bag in my freezer and I add to it when I have bones.


2) Once you have enough bones, dump the bag into your crock pot.

I have enough to fill the crock pot 3/4 full.


3) Add enough water to cover the bones.

I used 8 cups of water.


4) Add 2 tbs of vinegar to help get the most minerals out of the bones.

Apple cider vinegar is said to add the best flavour, so that's what I went with.


5) Add some veggies. This can be cut up whole veggies or kitchen scraps.

The classic broth veggies, and the ones I've added are: onion, carrot, celery.


6) Turn the crock pot on LOW and let it simmer for 24 hours. If you need to, leave the lid half off to keep it from boiling.

7) Strain your broth and drink a small cup of it with dinner. (Or use it as a soup base, or as the liquid to cook things such as rice... the uses are endless.)

If you have more than you want to use, go ahead and freeze it in mason jars and thaw when needed.

Be sure to toss the bones you strained right back into the crock pot and get a couple more batches out of it. How many? I'm not sure yet, but from what I've read 3 or 4 more batches can be expected but the flavour won't be as strong as the first batch. 

Monday, 10 December 2012

Soaking Oats

If you've been reading Nourishing Traditions, and you want to soak your oats, it's really quite easy to do. (I learned how here on Just Making Noise's blog).

Why soak them? According to Nourishing Traditions author, Sally Fallon, all grains contain phytic acid (and oatmeal is particularly high) which is a substance present in the bran of all grains that inhibits absorption of calcium, magnesium, iron, copper and zinc. Soaking (and also sprouting) helps to neutralize phytic acid.

Now I am in the habit of having some on the go all the time. Here's how I do it...

1: Warm 4 cups of water in saucepan on the stove (don't let it boil). It should feel like bathwater.

2: Pour 4 cups of oats (the slow-cook kind) into a non-metal bowl.

3: Add the warm water to bowl of oats.

4: Add 8 Tbs of Whey.

I use my left over whey from making yogurt. Just put the whey in a mason jar and keep in the fridge.

5: Mix it up and put a plate on top to keep the mixture clean.

Let it sit for 24 hours. Don't even think about it!

This is my whey, and jar of oats... and ceramic bowl.
(And that's my helper in the background!)

All mixed up.

Covered and ready to stick in a corner on my counter.

When finished, you can spread it out on parchment paper that has been rubbed with a bit of coconut oil and bake it in the oven at 250 F for 2 hours.

Turn it over with a spatula and cook another 2 hours.

(I find, I can loosen the oats from the parchment paper by running a spatula between them and then I can lift the oats as one big piece and flip it over.) When it's dry on both sides, it's done. If it's still "rubbery" cook it a little longer.

Afterwards, just break up into chucks and put them in the blender to grind into flake-size pieces.

Soaked, dried oats used for cereal.

Here is an example of some of my oats when soaked and dried. I keep them in a glass gar in the cupboard.

I use these "Soaked and Ready Oats" as they are called on Just Making Noise's blog as Cereal.

For use as Homemade Cereal, I add some chia seeds, some sliced almonds and pour cold milk over it all. Let sit for 1 minute and the consistency is like store-bought cereal.

I also use these oats in Mirko's Lunch Box Cookies.