Saturday, 16 March 2013

Sourdough Pizza

Little M likes pizza. Well, we all like pizza in our family, but Little M really, really likes pizza! So I make homemade pizza using sourdough crust, fresh veggies for toppings, and a pizza stone to make it crispy.

If you haven't read any info about sourdough, I will give you a short explanation:

The big deal about sourdough is that the "starter" is a colony of wild yeast and lactobacilli (good bacteria, as found in yogurt) and when you mix the starter with your flour and allow it to ferment, the bacteria eats (breaks down) the gluten, making the flour easier on the digestive system.

So, sourdough pizza is nice and easy on the belly. That's a good thing for kids, and for grown ups too.
Plus, freshly made pizza is yummy! We make 3 at a time, each of us customizing our toppings. And then we all have leftovers for lunches.

Okay, here's the recipe...

Pizza Dough

Ingredients

1 1/2 C sourdough starter
1 1/2 C whole wheat or unbleached white flour
3/4 tsp sea salt
2 tbs melted coconut oil

Method

1) Mix ingredients in a bowl and when a ball begins to form, pick it up and kneed it for 5 mins.

2) Rub a bit of coconut oil in the bowl and on the dough ball to keep it from drying out and/or sticking to the bowl.

3) With the dough ball inside the bowl, cover with clean dish towel and leave in a warm place (in the oven with the oven light on for example) for 3-4 hours.

Note: Traditionally olive oil is used in pizza dough. I chose to use coconut oil because olive oil denatures at the high temperature needed to cook pizza while coconut oil remains stable.

Here is my dough ready to be divided in 3 equal pieces to make 3 pizzas.

Making Pizza

1) Preheat oven (and pizza stone if you have one) at 500 F.

Warning: Never put a cold pizza stone into a hot oven, it may crack.

2) Chop desired toppings, grate cheese, make or open a can of pizza sauce. 

3) Place dough ball on floured surface and using a large knife, cut into 3 equal pieces.

We find it fun that we each get to make our own pizza!

4) Taking one piece at a time, roll into a round ball, then lay on floured surface and using a rolling pin roll out to desired thickness. (I like a thin crust.)

Mr. J doesn't use a rolling pin. He likes to throw it in the air and catch it on his finger tips. He ends up ripping holes in it and it looks pretty bad when he's done... but I don't say anything since I don't have to eat it (lol).

5) Because I use a pizza stone, I use a peel (large paddle) to slide the pizza into the oven. I sprinkle corn meal on the peel to prevent sticking and then lay the rolled-out dough on it.

6) Top the dough with pizza sauce, toppings of choice, and cheese if using.

I like to use basil leaves, spinach, peppers, mushrooms, onions, and almost any other veggie I have on hand. I also like pineapple on top.

I usually only use a small amount of cheese. I prefer cheddar because it's more flavourful, I find a little goes a long way. It looks like a lot in the photo, but that is mostly yellow and orange peppers you are seeing on top!

(Little M and Mr. J like meat like hamburg and bacon with their veggie toppings.)

7) Slide the pizza off the peel and onto the hot stone. Bake for 8 mins. Then put the next pizza in until everyone's is cooked.

Yum! Dinner time....

This one is mine, hot out of the oven.


Saturday, 26 January 2013

Chocolate Teff Pancakes

Made with teff flour, almond milk and chia seeds they are egg- and dairy-free and almost gluten-free (teff contains a trace amount of gluten).

These pancakes are so yummy! My kid loves them for a weekend treat. But they are hardly "treat food" when you consider the nutritional powerhouse on this plate! There's so much nutritional value here that I have to break it down....


Teff flour
  • all 8 amino acids
  • high in fiber
  • rich in iron, calcium, magnesium
  • contains trace minerals like zinc and copper
  • contains vitamins, A, B1, B2, B3, B6, E and K
  • very low gluten level *almost* gluten-free

Chia seeds
  • high in protein and fiber (5 grams of fiber in 1 tbsp)
  • rich in calcium, antioxidants and omega 3s
  • gluten-free
  • becomes gelatinous in liquid and can replace egg in cooking

Bananas
  • high in potassium and fiber
  • rich in magnesium, vitamins B6 and C

And then there's the Cast Iron pan
  • Cooking in an iron skillet greatly increases the iron content of many foods. (A study published in the Journal of the American Dietetic Association found that the iron content in 100 grams of spaghetti sauce jumped from 0.6 mg to 5.7 mg after being cooked in a cast iron pot.) Factors that boost the iron content from cast iron include acidic foods, longer cooking time, frequent stirring/turning, and using a newer iron skillet. (from health.columbia.edu)

Finally, the Almond milk is rich in calcium and most brands are fortified with vitamin D.

Recipe

1 ripe banana
3 tbsp teff flour
1 tbsp coconut flour
1 tbsp chia seeds
1 tsp real vanilla extract
1/2 tsp kosher salt
3/4 cup almond milk
1/2 tsp baking soda
handful of semi-sweet chocolate chips (optional)
coconut oil for cooking

This recipe makes 1 serving (3 pancakes). Just double it to serve a couple of people...

Method

1. Mash banana in bowl.

2. Add teff and coconut flours, chia seeds, kosher salt, vanilla and mix.

3. Pour in enough almond milk to make it pourable (about 3/4 cup).

4. Stir in the baking soda.

5. Melt coconut oil on medium hot cast iron skillet.


6. Pour batter to form 3 to 4 pancakes.


7. Turn when tops are bubbly and edges are dry.

Sorry, these pics don't make the pancakes look very pretty!

8. (Optional) When cooked on both sides, drop some chocolate chips on top and continue to cook for about a minute. Chips will start to melt.


9. After transferring to a plate, use a butter knife to spread the chocolate evenly over tops.

Kids should find these pancakes sweet. The almond milk and banana do enough to sweeten them, sugar is not needed. I use semi-sweet or dark chocolate chips and that seams good too.

I personally find them a bit too sweet and I actually add some sourdough starter or kefir to the mixture when I make them for myself. I like them to have a slightly sour tang but Mr. J and Little M like them as per the recipe above.

Wednesday, 23 January 2013

Cultured Butter

Earlier this week I posted the process of making homemade butter.
I would like to add the option of making cultured butter which I really like.

It's virtually the same process, the only difference is you culture the cream for 24 hours before you make the butter.


What makes cultured butter different from regular butter?
  • Cultured butter is sometimes called European butter because it is common there and newer to US and Canada.
  • It contains probiotics from the cultures which is a nice little boost nutritionally.
  • The culture breaks down the lactose in the cream making it easier to digest.
  • Culturing creates the optimum ration of omega 3 to omega 6.
  • Cultured butter has a more complex flavour. It's tangy and, well... buttery. Some butters add chemicals that they call "natural flavour" to try to replicate the classic cultured butter flavour.
Recipe

organic cream
culture (I use kefir grains)

Method


1. Pour the cream into a mason jar and add kefir grains to culture the cream. Top with a coffee filter held on with elastic band. Leave for 24 hours.


You can see the lumps of grains at the top in this cream.

If its very warm in your kitchen it could be ready sooner, even 8 hours.


2. Pour the cultured cream into a plastic strainer over a bowl to remove the grains. Keep the grains to do your next culture.

Note: Never use metal near your kefir grains. The vibration from the metal can harm the bacteria. Plastic strainer and utensils are a must.


Here are my grains in a clean jar, all ready to culture a new batch of milk for kefir, and my cultured cream in the bowl.


 3. Mix cream in a blender, mixer, or food processor.


Keep mixing, stopping to scrape down sides (or with a Vitamix, use the tamper). At first you will make whipped cream, then it will become very stiff whipped cream, then it will break into pea sized lumps in a milky liquid.

Keep mixing. Eventually the pea sized lumps will stick together in one big ball floating in buttermilk.

4. Pour the buttermilk out. Keep it in a jar in the fridge until ready to use. (A great addition to biscuits or pancakes.)


5. Transfer the butter that is left (after pouring the buttermilk off) into a bowl and wash the butter.

Washing the butter is exactly how it sounds. Pour filtered water into the bowl and use a spatula to move the butter around in the water. Drain the cloudy water and repeat 2, 3, or more times until the water is clear.

Note: Filtered water is needed as chlorinated water will kill the good bacteria from the culture.

Basically you want to push the butter onto the side of your dish, folding and pushing to SQUEEZE out any remaining buttermilk.

Why bother squeezing out the last of the buttermilk? Your butter will spoil quickly if there is buttermilk present. Getting it all out helps it keep longer. (Although cultured butter should keep longer than non-cultured.)

Optional: At this point you can stir in a small amount of sea salt to taste (I didn't salt mine.)


6.  Scrape the lump of butter out of the bowl and onto cheese cloth or a clean dish towel. Twist it up and squeeze gently to remove any last bit of water.


Put it in an air tight container (I have a locking lid for this glass dish) and it will be good for about a week on the counter or 2 in the fridge. It can also be put in the freezer for many months.

Tip: Buy your cream in the spring and early summer when the grass is fresh (that the cows graze on) and the nutrient quality of the cream is highest. Make lots of butter and store it in the freezer.

Strawberry Kefir Ice Cream

This "ice cream" is a favourite for me and little M. Now, Mr. J likes it, but we love it! We make it ALL the time!! We like it at breakfast, after school, or for dessert.

It's sweet and tangy and fruity... and it's full of nutritious goodness.

I use organic strawberries because conventional strawberries are heavily sprayed and have been shown to contain up to 36 different pesticides including methyl bromide. They are always featured at the top end of the dirty dozen list of the most toxic non-organic food.


Recipe

3/4 cup kefir
1 cup frozen organic strawberries
1 tbs raw honey
6 ice cubes

Any frozen berries work well, we also like blackberries and raspberries.

Method


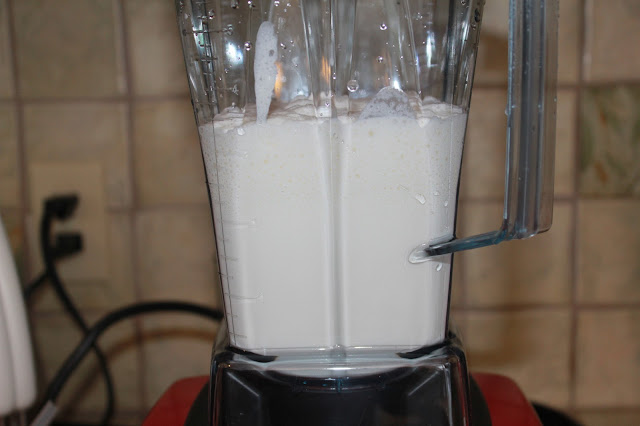
Drop all ingredients into Vitamix.


 Move speed quickly from 1 to 10. Use the tamper to push ice and berries down until all mixed (about 30 secs). Flip switch to high and run about 30 secs more, until 4 peaks form.


Scoop out with ice cream scoop.

Note: If using a regular blender, you can make the recipe with unfrozen strawberries and once blended put into an ice cream maker until set.

Saturday, 19 January 2013

Homemade Butter

The idea of making my own butter would have never crossed my mind a year ago. Images of pioneer women bent over an ancient-looking device, hours of blood sweat and tears... okay it might not have been that bad - but it sounded like hard work!

Imagine my surprise to find out that making my own butter is easy. At least it is with modern machinery. All you have to do is pour some cream into a blender, mixer, or food processor, and hit the button to make it spin. Eventually, there's butter in the bowl.

But why would I make it, even if it is easy? It's easier still to grab a block at the grocery store. The main reason is that any toxins present in the milk are generally stored in the fat. That means that your block of butter has most of the toxic chemicals from the cow's milk it came from all wrapped up in a pretty gold package for you to eat. Yum.

Buying organic butter greatly reduces the toxins present, but organic butter is expensive. At least it is in my grocery store (almost $10 a pound). Organic cream is cheaper. Plus, you get the benefits of a jar of fresh buttermilk as a byproduct (hello buttermilk biscuits!) and you get FRESH butter. You can have it salted or unsalted. Finally, you will know that there are no other additives and that the butter is not rancid. (Butter goes rancid easily.)

Ingredients
  • organic cream  (usually labeled whipping cream or 35% milk fat)

Method


1. Pour the cream into a blender, mixer, or food processor and mix.

I see many people use their Kitchen Aid mixer, but I used my Vitamix. That way, I didn't have to worry about splatter because of the lid. If you are using a mixer, start off slow to avoid splatter and then turn up the speed once it thickens.

Keep mixing, stopping to scrape down sides (or with a Vitamix, use the tamper). At first you will make whipped cream, then it will become very stiff whipped cream, then it will break into pea sized lumps in a milky liquid.

Keep mixing. Eventually the pea sized lumps will stick together in one big ball floating in buttermilk.


2. Pour the buttermilk out.

Keep it in a jar in the fridge until ready to use. Did I mention the buttermilk biscuits?


3. Now you have butter. But... your not quite done yet. You want to "wash" the butter.


Washing the butter is exactly how it sounds. Pour filtered water (or regular tap water) into the bowl and use a spatula to move the butter around in the water. Drain the cloudy water and repeat.


I washed mine 3 times before the water was clear.

Basically you want to push the butter onto the side of your dish, folding and pushing to SQUEEZE out any remaining buttermilk.

Why bother squeezing out the last of the buttermilk? Your butter will spoil quickly if there is buttermilk present. Getting it all out helps it keep longer.

Optional: At this point you can stir in a small amount of sea salt to taste (I didn't salt mine.)


4.  Scrape the lump of butter out of the bowl and onto cheese cloth or a clean dish towel.

Twist it up and squeeze gently to remove any last bit of water. (Don't squeeze too hard or the butter will be oozing through the cloth...don't ask me how I know this.)


It will be good for a few days on the counter or a week or more in the fridge. It can also be put in the freezer for many months.

Tip 1: Put it in an air tight dish (I have a locking lid for this glass dish) as butter absorbs odors that surround it.

Tip 2: Buy your cream in the spring and early summer when the grass is fresh (that the cows graze on) and the nutrient quality of the cream is highest. Make lots of butter and store it in the freezer.

This butter is so LIGHT and FRESH. It has a whipped consistency, and a mild, slightly sweet taste.

Friday, 18 January 2013

Homemade Nutella


My son loves Nutella... well, who doesn't? We decided to make our own after I was inspired by the recipe found on this blog.

We had 3 main goals - It had to be nutritious, it had to be smooth and it had to be chocolatey! It is all of those things and more.

It passed our family's taste test and also my mom's. She thought it would be great to keep in the fridge to enjoy a spoonful when a chocolate craving hit!


The Recipe

1/2 cup raw hazelnuts
1 tbs coconut oil
1 tbs real vanilla extract
2 tbs dark cocoa powder
3 tbs real maple syrup


The Method


 Heat oven to 350 F and roast raw hazelnuts for 10 minutes. Let cool.

Watch the clock or set a timer. Nuts roast very quickly and even continue cooking after being removed from the oven. Under roasting is better than over roasting. (I speak from experience after over roasting peanuts for peanut butter. The flavour was overpowering.)


Rub the hazelnuts in your palms and the skins will fall right off. Little M calls this "taking off their jackets" which I think is quite cute!


Gather ingredients.

I used real vanilla extract because the artificial vanilla is quite toxic. (Further info about toxicity.)

The cocoa I used is called ruddy red cocoa and it's a beautiful dark colour that's so rich in flavour. You can get it at the Bulk Barn.

Melt coconut oil for easier blending.

Put the roasted hazelnuts and rest of ingredients into blender. A high-speed blender is best to get a smooth result. I used a Vitamix. I stopped a few times to scrap down the mixture and be sure that it was getting blended thoroughly.


This nutella is so fresh and bursting with flavour.


Little M wanted some on toast immediately!

I've got Kefir!

Milk Kefir Grain
I have read all about the health benefits of kefir and I was sooo ready to make my own. In a nutshell it's like a ramped-up version of yogurt. While yogurt has a few strands of beneficial bacteria, kefir has upwards of 30 strands. Also, it's easier to make because it ferments at room temperature while yogurt requires some sort of heat incubation. If you want more info about kefir, check out Cultures for Health's Kefir FAQ page.

I couldn't wait to get started so I called our local health food store to ask if they carried kefir grains (little globs of cultured bacteria and yeast that look little mini cauliflowers needed to turn milk into kefir) but alas... they did not. I live in Prince Edward Island and it can be difficult to get specialty items here.

After some snooping around, I found a lady who had extra culture of her own and was willing to sell some. I was so excited. She lives on a farm in the country so my husband (Mr. J) and I waited for a nice sunny day (it's winter here) to pack up the baby and take a drive out to the country.

We had the usual PEI instructions, which include things like "look for such and such landmark, turn left, drive for X amount of minutes" and ending with "we are the second farm on the left".

The driveway was very long and climbed uphill and we noticed a ravine of flowing water on either side of the long drop if one were to go too far on either side of the driveway. As we carefully drove on, we realized how icy it was. Now, there's normal icy and then there's this driveway... it was like driving on a pond, only up hill. We started to feel panicked... okay, I started to feel panicked, Mr. J started grumbling - what was so important about this frigin' kefir crap that we had to be navigating this death trap?

When we got to the house, we carefully worked on turning the car around. We slid and slipped and I was actually getting scared. I was no longer thinking about the grains, but we had come this far, so I wasn't going to leave without them. The lady was really nice to me and she was quite apologetic about the driveway. It seams she hadn't known it was that bad. She brought me inside to her farm house that was more than a century old. It was pretty neat to see, as I like that sort of thing.

By the time I had gotten back to Mr. J and baby A, I found out that the car had been slowly sliding while parked! There was no water or drop off at the top of the driveway so no immediate danger, but it was unsettling nevertheless. Mr. J was in a big hurry to get out of there. So I held my little dish of grains and said a prayer for our safety as we descended the long driveway. As we got closer to the water and the steep drop off, no one said a word. He was concentrating on keeping the car straight as an arrow and I was holding my breath. Finally we made it to the main road - what a relief!

When we arrived home from out little, ehem... adventure, I looked at my little kefir grains and thought, "boy you all were an awful lot of trouble." I put them in a glass jar and covered them with milk. I topped the jar with a coffee filter held on with an elastic band so the kefir could breathe.

I sure hope our family enjoys the kefir and gets plenty of health benefits from it. I know it will be a long while before I can talk my husband into "a little drive to the country to pick something up".

Friday, 11 January 2013

Brined Turkey

This year we bought a fresh local turkey at Christmas time and I was interested in learning to BRINE the turkey before cooking it. I went in search of recipes and info online and gathered up my ingredients... and here's how it went. (I mostly followed the brine ingredients from The Pioneer Woman's blog)

Brining results in tender and juicy meat because the salt water enters the cells via osmosis and causes them to plump up with water. You will never end up with dry turkey if you brine it first.

One word of caution... you can only brine a fresh turkey because the frozen turkeys already have a salt solution added and brining would cause over-salting.

So, we bought the turkey (unfrozen) on Saturday and put it in the fridge.

On Monday morning, I put it in my brine. I had planned to let it brine for 24 hours, but I phoned my brother in St. John that morning (who regularly brines his turkey) and he told me to allow time for it to "air dry" in the fridge before cooking so the skin will crisp up. Apparently taking it out of the brine and putting it straight into the oven will cause the skin to be soft and gummy. Well, I wasn't going to take that chance so I decided to brine for the day only and let it air dry in the fridge overnight.

The first thing to do is Make your Brine...
(recipe can accommodate a 20lb turkey)


In a large stock pot, heat up:
  • 3 cups apple juice
  • 1 1/2 cups kosher salt 
  • 5 cloves minced garlic
  • 2 cups brown sugar
  • the peel of 2 large oranges
  • 3 tbs peppercorns
  • 5 bay leaves, whole
  • 1 tbs whole cloves
  • 1 tbs ground poultry spice
  • 2 gallons (32 cups) of water
 Bring this to a boil and then let it cool completely.


Put your turkey and brine in a large brining bag and store in the fridge for 12-24 hours.
Or, if you have a large enough stock pot that your turkey fits into, just put the turkey and brine in it and store it in the fridge with the lid on.

(note: before putting your turkey in brine, remove giblets and put them in a sealed dish in the fridge to cook for gravy if you have them.)

Now, here's where we had a problem...
We couldn't find a brining bag! And, we had a really big turkey so it didn't fit into the stock pot.

We had to improvise. My husband ran out and bought a bag meant for cooking a turkey. Instead of having a ziplock top like the brining bag would have, it had to be closed with a plastic tie. Very awkward when full of liquid!!! But, we somehow made it work.

Next year, we will simply get a smaller turkey and put it in the stock pot to brine as we found the 20lb turkey to be too large to work with in general. For example lifting it out of the oven to baste it was quite difficult for me because of the weight, not to mention the whole thing is piping hot so you have to be very careful with it.

That night before bed, with my husband's help (seriously heavy!), I took the pot out of the fridge, drained the brine into the sink and submerged the turkey into the other side of the sink filled with fresh cold water for 20 minutes to get rid of the excess salt.

Then we put it in a clean roaster and let it air dry in the fridge for the night.

 Roasting the Turkey

On Tuesday morning (Christmas day) I gave the turkey one more rinse with fresh cold water. I made stuffing and stuffed the turkey.

At noon, I preheated the oven to 275 F. I added a cup of water to the roasting pan, covered the bird with foil and put it into the oven on the lowest rack for 3 1/2 hours.

After the 3 1/2 hours, I took the foil off the bird, basted it with the juices and turned the oven up to 375 F.

I continued to baste the turkey every 1/2 hour or so and cooked it for another 3 hours. This amount of time will vary from oven to oven and depending on the size of the bird. Check it every time you baste to see how its going.

We used a meat thermometre pushed into the hip area to tell us when it was done. Poultry should have an internal temperature of 185 degrees F.

(My mom says she never used a thermometre. She just lifted one of the legs and if it came apart from the body easily, then it was done... simple as that! She says it works every time.)

Once it is done, or close to done, brush the skin with melted butter and let it crisp for 20-30 minutes.

Then take out the turkey, remove it from the roaster and place it on a large plate, covering it with the foil you took off earlier to keep it hot while you make gravy in the roasting pan on the stove top.


 And that's it... one juicy, tender and crispy turkey!

Tuesday, 8 January 2013

Listmania: Grocery Items

This is a list of what we keep in the house food-wise. It evolves and changes. Sometimes items for a specific recipe are added and sometimes I don't have all these items on hand... but it's what's commonly needed in our house.

I use it as a master list that I keep in a word file. It helps me keep track of items that need to be bought or made and also the best sale prices so I can note when something is on a really good sale and can be stocked up on. I thought I'd share this master list on my blog...

Note: * indicates homemade items. (I hope to add *'s to more and more items!!) 
indicates organic items. (We buy specific items organically when we can. For example, potatoes because they are so heavily sprayed and cream/butter because toxins are stored in fat.)


Refrigerator


Beverages
3% milk
almond milk
cream ‡

Food
yogurt *
kefir *
eggs ‡
breakfast sausages (locally made, no MSG or byproducts)
bacon (locally made, no MSG or byproducts)
cheddar cheese
mozzarella cheese
goat cheese
ginger root
garlic bulb

Dry Items
nori sheets
flax seeds
sea salt

Condiments
jams *
nutella *
mustard pickles *
pickled beets *
whey *
pesto *
tehini * 
olives
pure maple syrup
peanut satay sauce
fish sauce
curry paste
red chili paste 
sesame oil
ketchup
bbq sauce
bragg liquid soy
mayonnaise

Fruit
apples ‡
oranges
lemons
grapes

Vegetables
onions
carrots ‡
tomatoes
sweet potatoes
zucchini
mushrooms
orange/yellow peppers
cucumber
celery ‡
spinach
lettuce
cilantro
 
Supplements
probiotics
fish oil
vitamin C powder

Kitchen Counter


Food
sourdough bread ‡*
butter ‡*
bananas
potatoes ‡

Supplements
multi-vitamins
vitamin D
glutamine

Cupboards


Tea & Coffee
coffee
black tea
green tea
herbal teas
dried rose buds

Grains & Dry Goods
whole wheat flour ‡
rye flour
quinoa flour ‡*
oat flour *
teff flour
coconut flour
almond flour *
cornmeal
quinoa ‡
millet
wheat berries
kasha
oats
basmati rice
brown rice
wild rice
lentils
chick peas
kidney beans
navy beans
chia seeds
poppy seeds
kosher salt
baking soda
baking powder
dried coconut
dark cocoa powder
chocolate chips
brown sugar
white sugar

Liquids & Solids
peanut butter *
almond butter *
coconut oil
olive oil
balsamic vinegar 
apple cider vinegar
white vinegar
vanilla extract
almond extract
raw honey
blackstrap molasses
fancy molasses
agave nectar

Canned & Packaged
whole wheat pasta
rice pasta
rice crackers
popcorn
hot chocolate mix
marshmallows
coconut milk
evaporated milk
whole tomatoes
stewed tomatoes
tomato paste
pumpkin puree
pineapple chunks
salsa ‡
tuna
crab
salmon

Spices
black pepper
cayenne pepper
chili powder
dried chili
paprika
coriander seeds
curry powder
garam masala
turmeric
ginger powder
garlic powder
onion powder
dry mustard powder
mustard seeds
nutmeg powder
pumpkin pie spice
Chinese five spice
cinnamon
Thai coconut seasoning
pizza seasoning
poultry seasoning
summer savory
oregano
basil
whole bay leaves
whole cloves

Freezer (small)


Soups & Broths
bone broth *
butternut squash soup *
chicken and rice soup *
various bones

Breads & Baked Goods
sprouted bread
sprouted wheat *
lunch box cookies *
banana bread *
muffins *
zucchini brownies *
  
Fruits & Vegetables
strawberries
blueberries
cranberries
peas
corn
sliced zucchini
cherry tomatoes

Nuts & Seeds
whole almonds
sliced almonds
hazelnuts
peanuts
walnuts
pecans
macadamia nuts
hemp hearts
sesame seeds

Freezer (large deep freezer)


Meat
various pork cuts (bought in bulk from local farmer)
various beef cuts (bought in bulk from local farmer)
whole chickens (bought from local farmer)
whole turkey
bone in chicken pieces
salmon
halibut
shrimp

Extras
extra butter
extra bread
extra coffee
ice cream
sometimes I have lasagnas, casseroles or pies *

Monday, 7 January 2013

Listmania: Snacks

I want to keep a running list of favourite snacks for myself and the family. This will be helpful when I get stuck on the same loop of 2 or 3 snacks and need a change. I can read my list and say, "oh yeah, I love such and such!"

My most favourite snack is an apple. I just love them. I eat one every day. But sometimes I need to mix it up. So here is a list of the different things I like to snack on... some more often than others.

I've divided them into categories although some snacks could fit into more than one.

Feel free to leave a comment with a favourite of your own :)


Yogurt
Yogurt with Bananas and Pecan halves
Yogurt with a touch of Honey stirred in, topped with Chocolate Chips
Yogurt with chopped Apples and homemade Granola
Yogurt with chopped Apples and Almond slices
Yogurt with Grape halves and Chia Seeds

Smoothies
Mean Green smoothie
Chocolate Banana smoothie
Orange Carrot smoothie
Apple Cucumber smoothie
Very Berry smoothie

Nut Butters
Peanut Butter with Apple slices
Peanut Butter with Celery sticks
Almond Butter on Banana
Almond Butter on Toast
Homemade Nutella on Toast

Veggies
Carrot sticks
Celery sticks
Broccoli and Cauliflower pieces
A handful of sprouts
Sunshine sticks (sliced yellow and orange sweet peppers)
Carrot sticks with Hummus
Carrot and Celery sticks with Baba Ganoush 
Avacado slices

Fruit
Apple
Watermelon chunks
Orange slices
A bowl of mixed Berries
Applesauce with Cinnamon
Strawberries with real Whipped Cream
Pinapple chunks
Pomegranate
Grapes
Pear
(really any fruit could go here, but those are my favourite!)

Baked Snacks 
Banana bread
Chocolate Teff bread
Lemon Poppyseed muffin
Zucchini brownies
Oatmeal cookies

Other
A sheet of Nori (seaweed)
A square of dark Chocolate
A thumb-sized piece of Aged Cheddar
A glass of Almond Milk
Herbal Tea

Tuesday, 1 January 2013

Christmas Dinner Meal Planning

Well here it is January 1st (Happy New Year) and I'm finally ready to post about Christmas Dinner...
Took me a while :) 

This post is more of a MASTER SCHEDULE for Christmas dinner and the subsequent recipes for side dishes and left over meals. I am creating this post to refer back next year. Why figure out everything all over again?? And, if there is anyone out there who finds this useful for their Christmas or Thanksgiving meal... or heck, even a regular old Sunday family dinner of turkey and the fixings, all the better!

This Christmas, true to my increased awareness in food responsibility, we purchased a LOCAL, FRESH turkey. Here in PEI, that cost us $45 for a 20 lb turkey. This is about one and a half times the price of a frozen suppermarket turkey.

So, with hard-earned money spent, not to mention awareness of the sacrifice of this animal for our meals, I committed to making the most of the bird.

Here is what that 20 lb turkey yielded for our family:

  • Christmas Dinner for 4 adults, plus children
  • A number of Leftover Dinners that were repeats of the full Christmas meal in the following 2 days
  • 3 Turkey Pot Pies (one was so large you could say 4 pies!)
  • A large casserole dish of Sweet & Sour Turkey
  • 1 Quart of Bone Broth
  • 2 Quarts of Coconut Thai Soup
  • A medium bag of frozen Shredded Turkey
  • A large freezer bag of the bones for another round of Bone Broth later.


In the end, all that was discarded into the compost bin was some fat and skin. As a side note, our turkey did not come with the giblets or I would have had giblet gravy and liver pate to add to our cooking.

The Meal Planning segment of this post...

1) Make a list of what you want to serve for Christmas Dinner:

Turkey
Stuffing
Mashed Potatoes
Mashed Turnip
Carrot Coins
Cranberry Sauce
Mustard Pickles
Pickled Beets
Cranberry Juice

Pumpkin Pie
Whipped Cream

There it is, the traditional Island Christmas dinner. Side note: next year we will have some wine to serve with dinner. We are just keeping it out of the house this year because I love wine but am unable to drink it because I am nursing.

(When I got pregnant, my husband and I decided to leave wine out of the house for two years as we are both wine lovers and enjoy setting our own wine and thought a two year break for us would give us a renewed excitement for wine making when we could start up again.)

2) Make a list of what you want to make with leftover turkey:

Turkey Pot Pie
Sweet and Sour Turkey
Bone Broth
Coconut Thai Soup

These items were chosen because they didn't require any extra ingredients. For example the turkey pot pie used up leftover items only. The bone broth was mostly just bones and the Thai soup was mostly bone broth with a can of coconut milk. (There were a few extra ingredients in these recipes but they were all things I keep around the house anyway.)

Therefore, my grocery list focuses only on items needed for Christmas Dinner.

3) Gather all the recipes needed to make the dinner and make a grocery list.

4) Create a schedule of when you will make your Christmas dishes.

Below is my schedule with links to the recipes I used.


3 Days before Christmas


Buy all ingredients needed for cooking including fresh turkey, store in refrigerator.


2 Days before Christmas


Make 4 double Pie Crusts, refrigerate in disks wrapped in plastic wrap.
Make Cranberry Sauce.
Bring Mustard Pickles and Pickled Beets up from the basement/cold room, refrigerate.

1 Day before Christmas (Morning)


Make Turkey Brine, wash turkey and put into brine, refrigerate.
Bake two Pumpkin Pies (using 1 of the 4 disks in the fridge).

1 Day before Christmas (Evening)


Spread bread cubes out on pans to dry overnight for the stuffing.
Chop onion and celery, place in dish and refrigerate for the stuffing.
Take turkey out of brine before going to bed. Soak in cold water in the sink for 20 mins and transfer to dry pan. Leave it to "air dry" in the fridge overnight.


Christmas Day (Morning/Mid Day)


Make Stuffing.
Stuff Turkey and put it in the oven at noon.
Peel potatoes, turnip, carrots.


Christmas Day (Close to Supper Time)


Brush turkey with butter for 1/2 hour of cooking.
Cook potatoes, turnip, carrots.
Take turkey out of oven, put on plate covered with foil to keep warm.
Make Gravy.
Set the table.
Serve dinner!


Christmas Day (Evening)


Put on Coffee, Tea.
Make Whipped Cream.
Serve pumpkin pie and cream for dessert.


After Christmas


When Christmas dinner is all over enjoy leftovers until tired of turkey dinners!

Then make Turkey Pot Pie with all the leftovers to freeze. After pies are made, continue to remove and shred all the meat from the bone.

Use the meat for Sweet & Sour Turkey. Freeze any leftover turkey, if there is any at this point, in medium freezer bags for meals in future.

Dump the bones into the crock pot to make Bone Broth. This yielded 2 quarts of broth.

The first one I froze for later. The second, I used to make Coconut Thai Soup.

Finally, take the bones that were strained out of the broth and put in a large freezer bag to keep for another broth. (You can use the same bones for a number of broths).

Discard any skin and fat into compost.